The WIP manager oversees the transition from raw materials to produced goods within an organization. It provides essential manufacturing support, aids in production scheduling, controls materials, and tracks resources. Below, let's delve into the detailed steps of utilizing the WIP manager. It's crucial for an organization to maintain process data.
WIP manager is reachable to download on Windows and Linux.
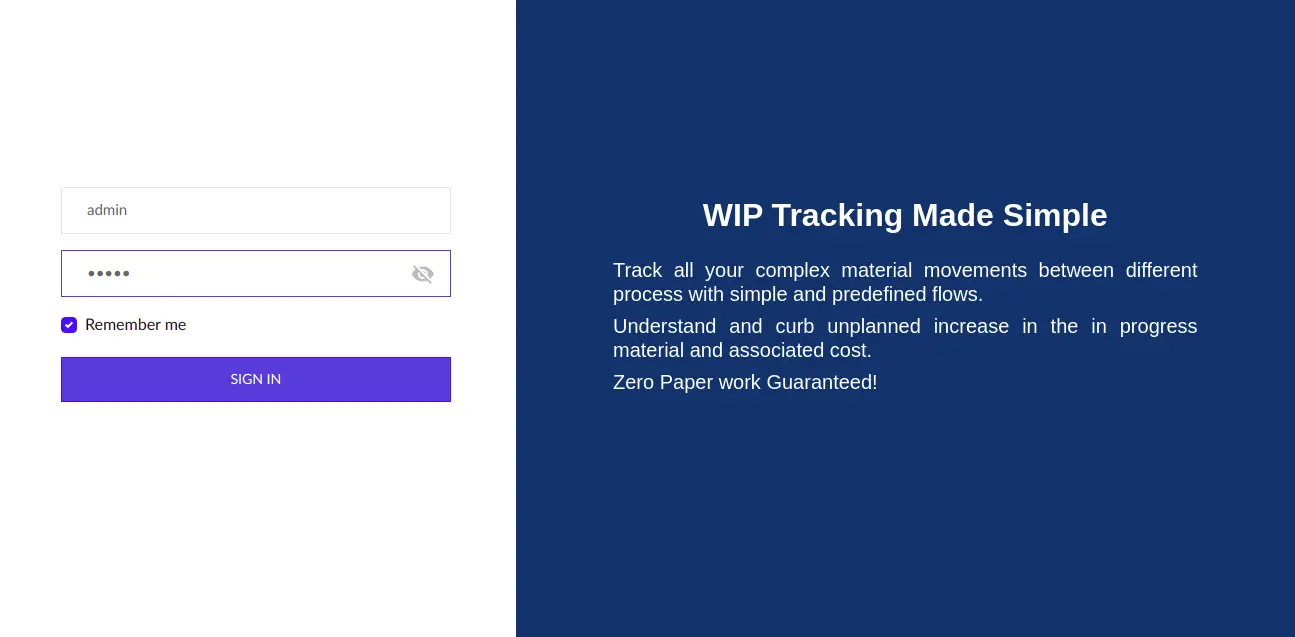
The above screen capture represents the login page of the WIP manager. It is the gateway to manage your manufacturing details in your organization. Made for easy tracking of the production process, and also helps to maximize productivity. This login page gives the support to manage your manufacturing details safely.
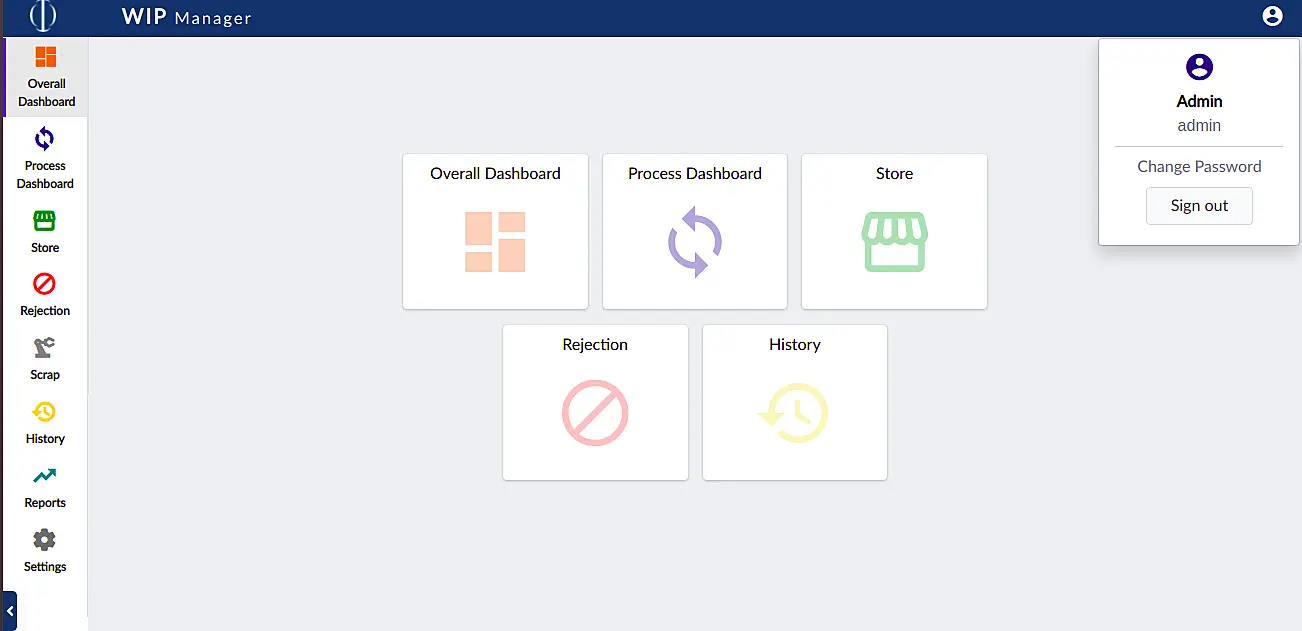
In the right side corner of this page, there is a sign-in icon where you can change the password and sign-out from the page.
It is the primary page in the WIP manager. It contains many icons. They are the overall dashboard, process dashboard, store, rejection, history, and general settings. Let's see one by one.
The Super-admin / admin who has complete access in the manufacturing can update the process details, user details, part details, rejection reasons, and the inventory details for the first process based on the manufacturing. Then the process of rework from rejection is also determined by the super-admin/admin. The other pages in this WIP manager are based on these settings. Let's see the setup, step-by-step procedure below.
The Settings icon is used to change the settings of this WIP manager based on your manufacture. Here you can add the process name based on your requirement by clicking the "+" icon in the right side corner of this page. By default, the store process is always presented on this page with the process order number "1". Here, you can append the process name, description, and process order for your manufacturing. You can choose rejection in which process takes place. You can edit or update the details of this page by using the edit symbol, which appears when touching every row.
The manager for this process will be included once the procedure is added here. This is beneficial when incorporating employee details within the user management settings page.
In the Settings section, the user management page is designated for handling employee details, including capturing the name, role, status, phone number, and last login information. Employee details can be accessed during creation. Access within the WIP manager varies based on the employee's role. Utilize the "Add User" icon on the page's right corner to input employee information. Editing, updating, or deleting details can be done using the symbols provided alongside each row. Within this WIP manager, a single Super-admin oversees manufacturing.
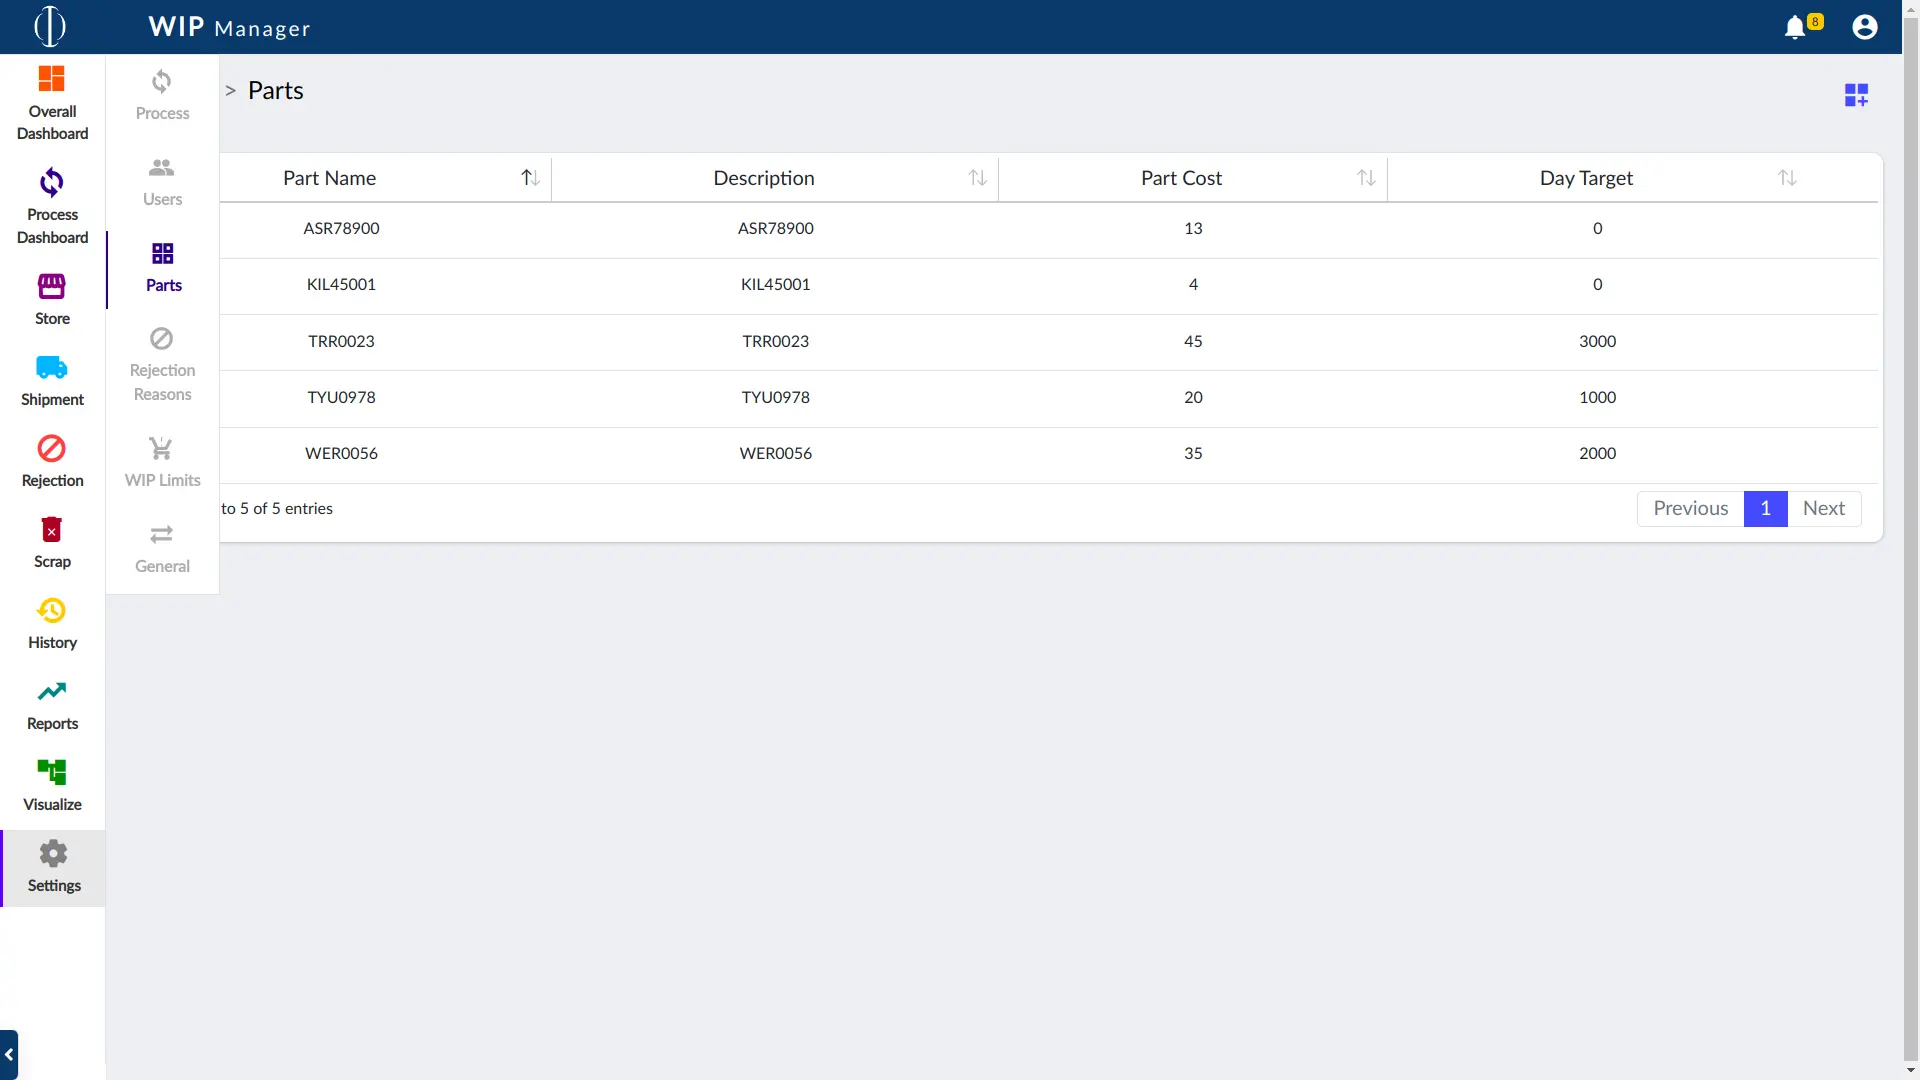
Within this parts page, you can include part names and their descriptions using the "Add Part" icon located on the right side of the page. These details will be utilized across the overall dashboard, process dashboard, and store page. Every row allows for easy editing of details. Removing part information is possible by selecting the delete symbol available upon clicking each row.
On this page, you have the option to add rejection reasons as needed. Use the "+" icon to include rejection reasons. Each row can be edited accordingly. These reasons are visible on the process dashboard page and assist in selecting rejection reasons for parts.
In this general page, under the settings icon, you can set the inventory for the first process. Append the details where the raw materials for production come from. If you desire to recycle the process from the rejection, then choose the process after rejection, where the rejection part goes for recycling.
The Store is always the first process in manufacturing. Generally, the store makes a stock of raw materials for the production in manufacturing.
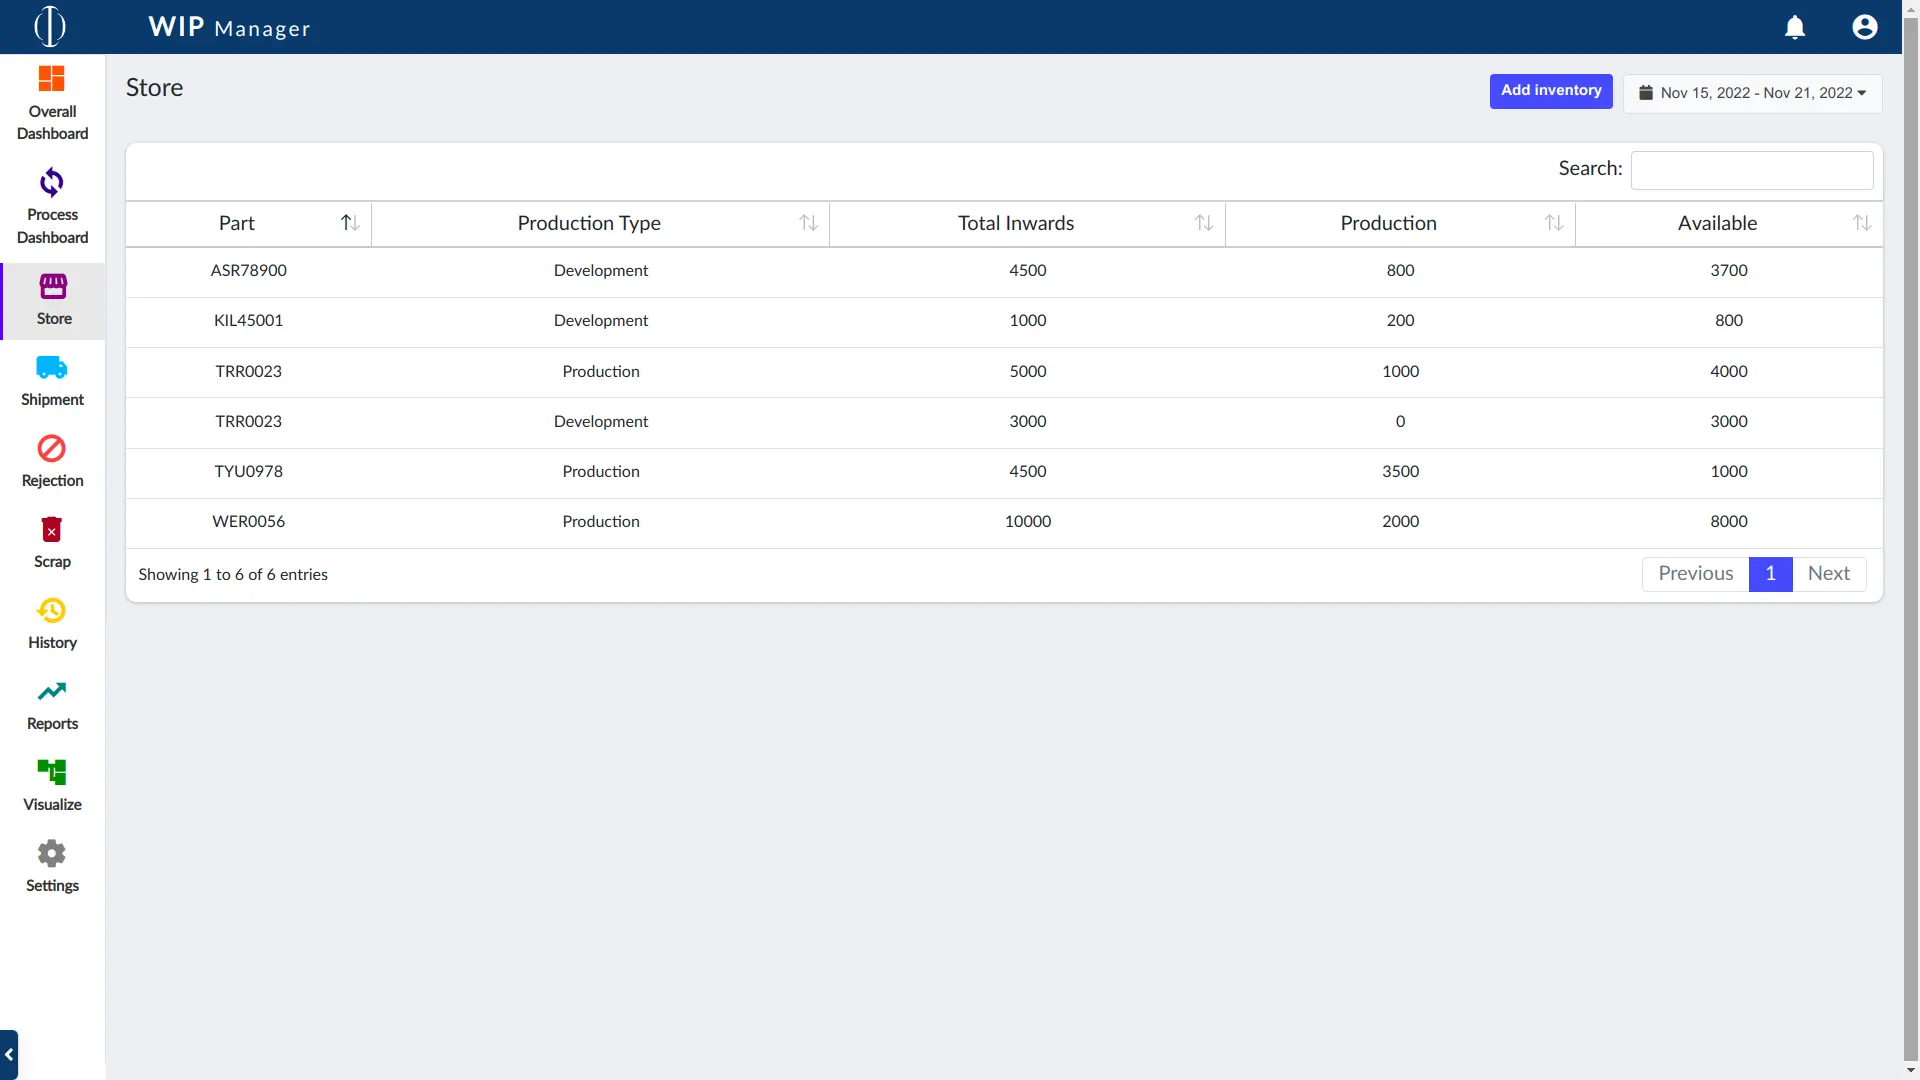
The store page in this WIP manager, contains the particular process part, production type, inwards, and production details. This page helps to find out how much a product has achieved and how much is available in a process. Using the "Add inventory" button, append the process, part, production type, track number, and count. You can edit or update the details with the edit symbol which is shown when tapping every row of the page. If you append the above data clearly, you can get the appropriate available amount from the total inwards of the specific part. To access specific time details, simply select the time located in the right corner of the page.
With WIP manager, track the material movements in manufacturing. In the manufacturing process, the materials moves from one process to another for production. You can make the material movements from one process to another using the Process dashboard and also view the material movements in the process dashboard page.
From the Process dashboard, you can access specific process details. Select the desired process within the store button to view part, inward, outward, and WIP details. Additionally, obtain a bar chart showcasing the top 5 WIP parts related to the selected process. Two options available on this page are: sending and rejecting.
If you need a particular time data, you can get it by choosing the schedule in the right side corner of the page.
Rejection - In the manufacturing process, rejection is a key factor that identifies product quality and productivity-related problems.
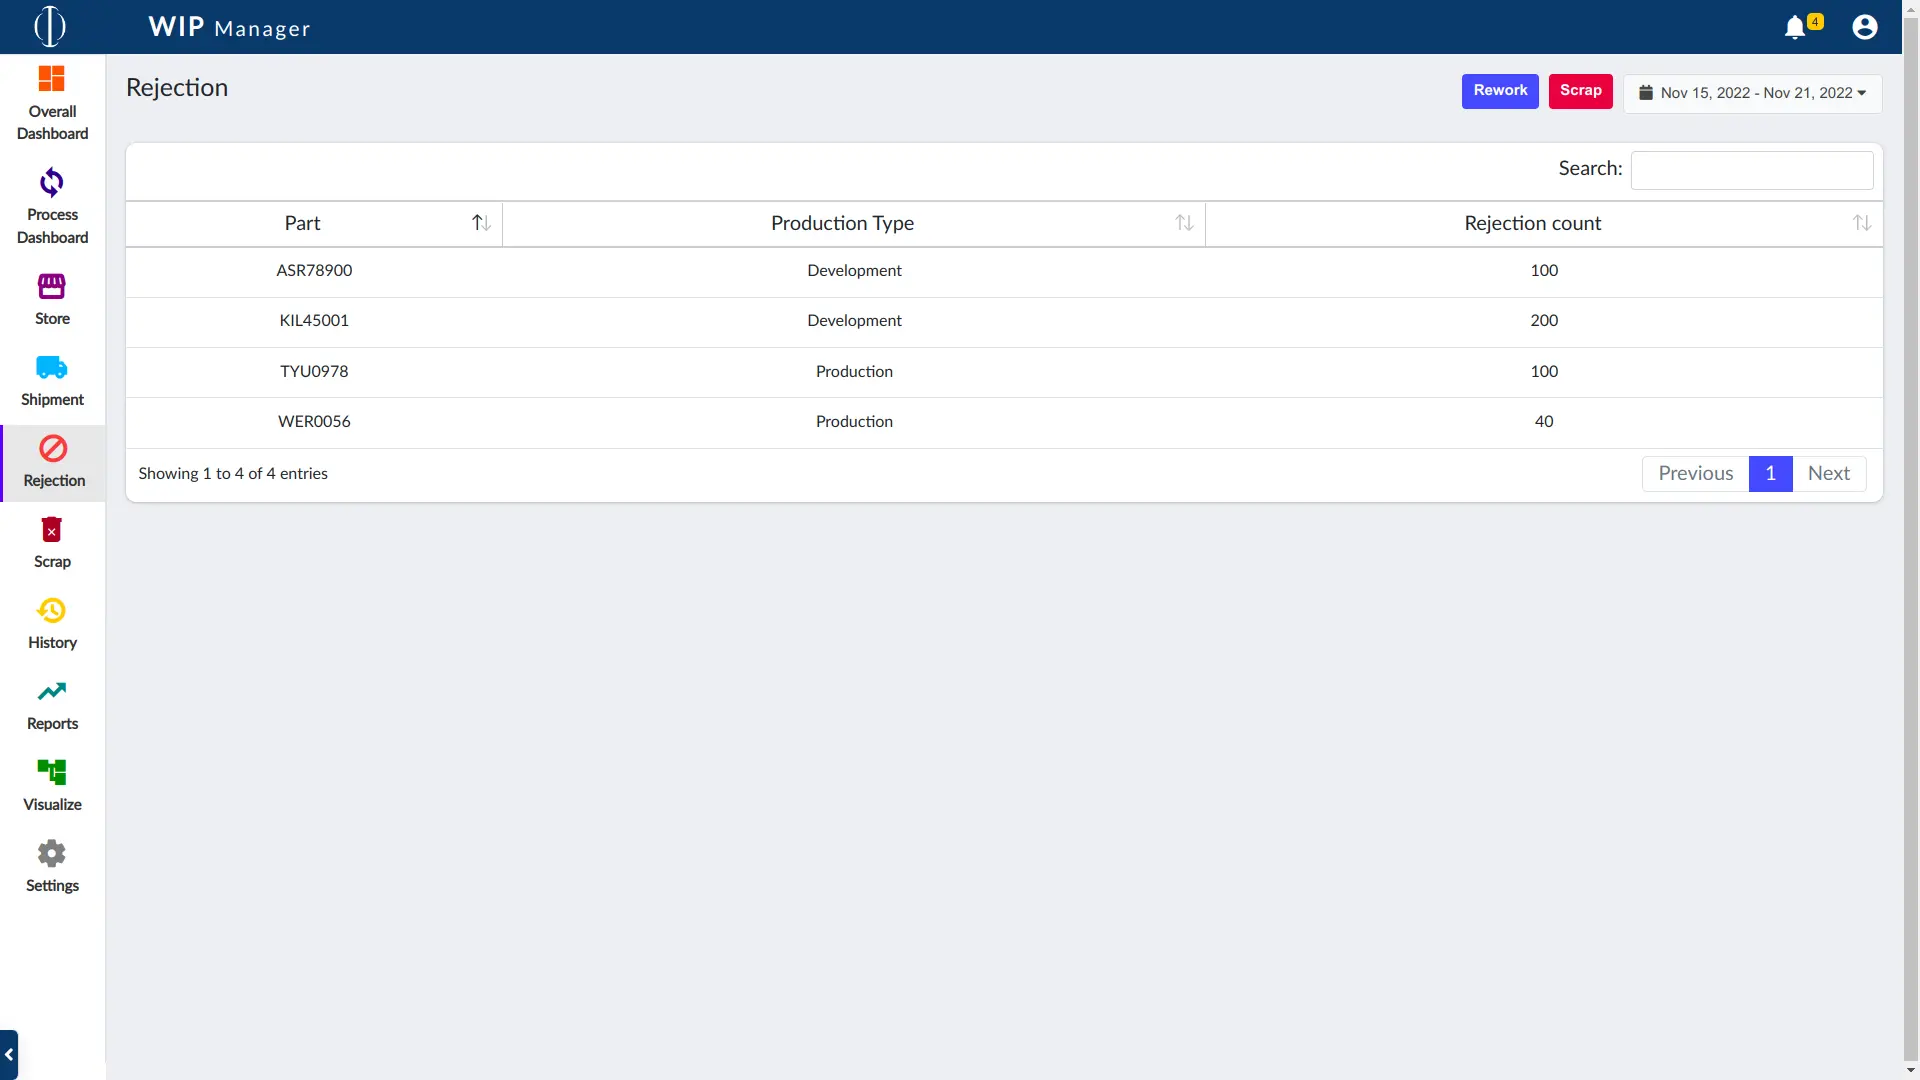
On this page, you'll locate the rejected parts, which were rejected from the process dashboard
page.
Within this section, you have two options: rework and scrap.
Rework - Work again with the used material in the production.
Only the rejection manager is allowed to rework the rejection material.
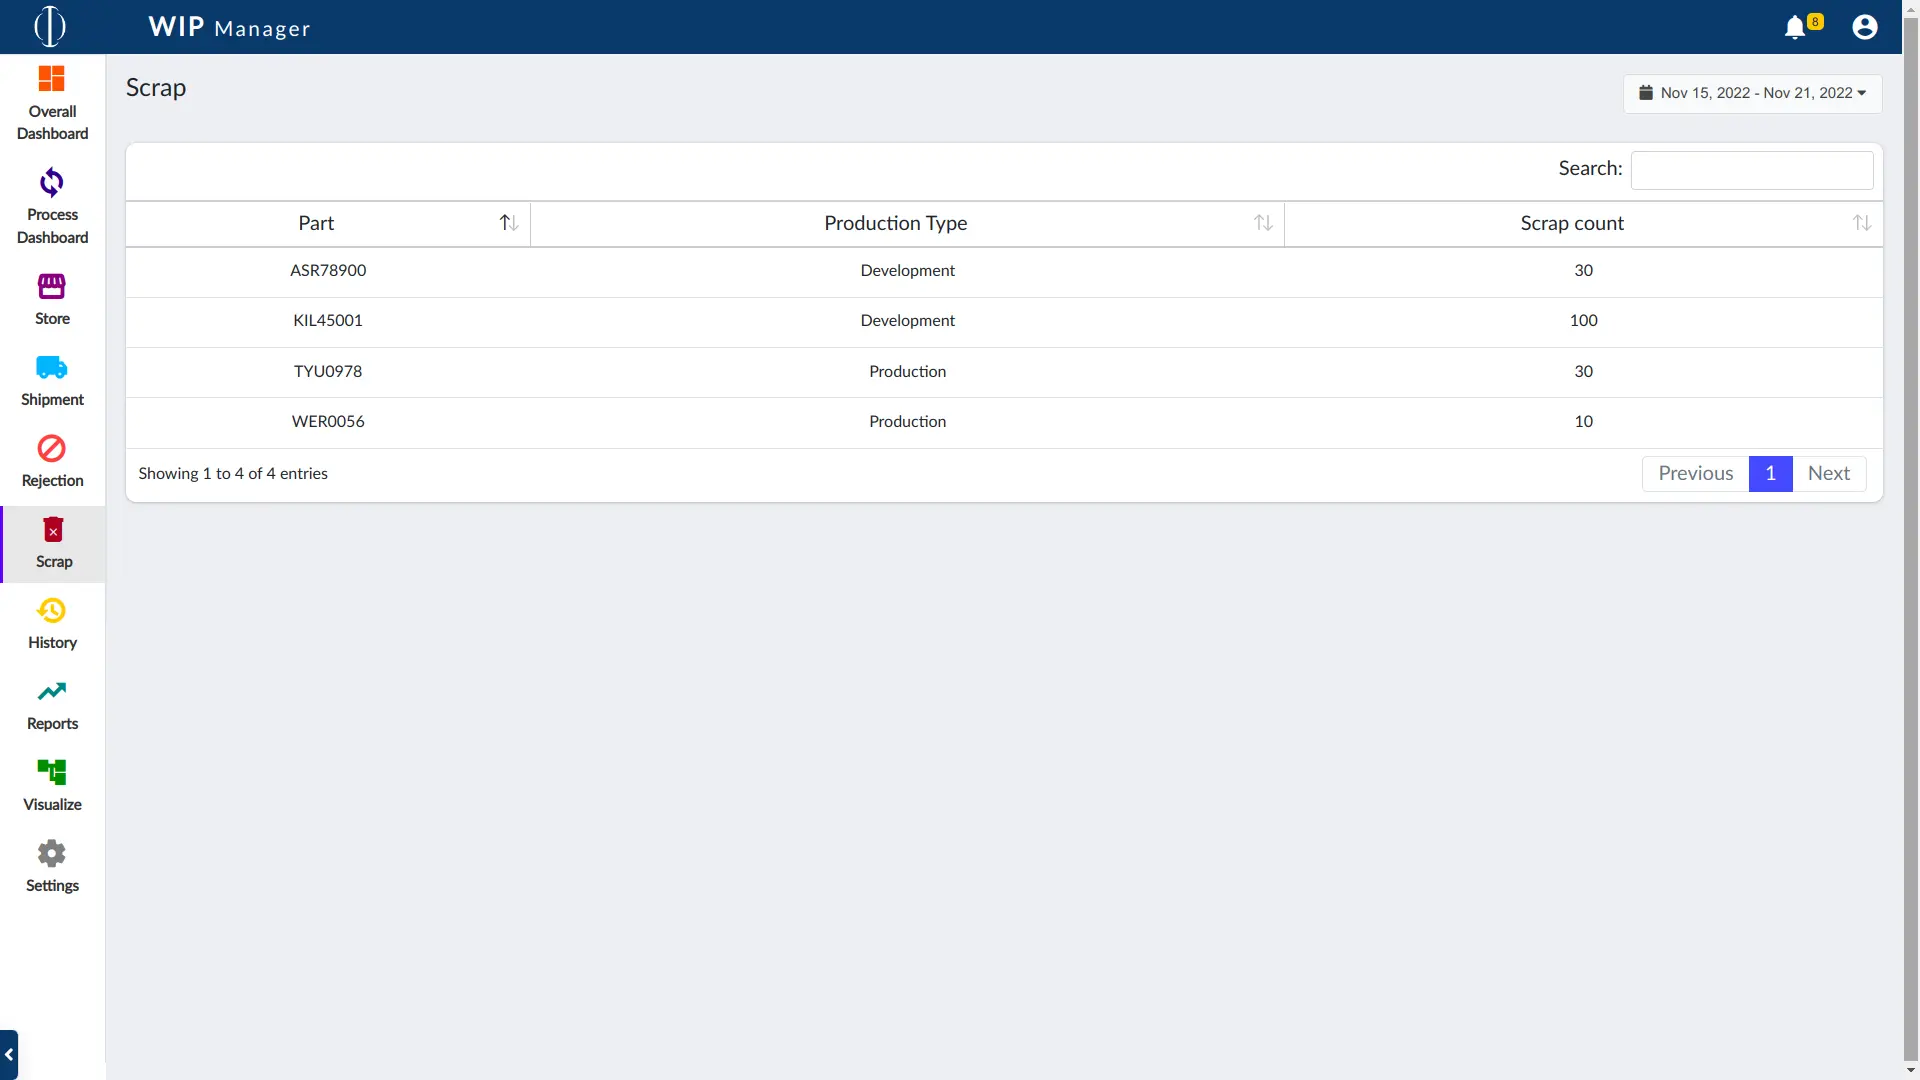
Scrap - The material is discarded from the process of
manufacturing. Only the manager of a
particular process is allowed to scrap items from that process to the scrap page.
If you need to rework with the rejected materials, then choose the production type, part, WIP
amount by tapping the rework button.
If you want to make the materials to the scrap, then tap the scrap button and fill in the
details precisely.
You can also access specific time details as needed from here.
You have the option to include rejection reasons based on your needs in this section. Similarly,
you can edit each row as required.
These reasons are visible on the process dashboard page and assist in selecting rejection
reasons for parts.
The Scrap page contains details of materials discarded from the rejection page, which don't contribute value to manufacturing. This page displays the amount of material sent to the trash bin. You can access specific time scrap details by selecting the schedule in the right corner of the page.
The history page logs every event across all stages. Here, you can access historical data categorized by date, part, and process. Each row is individually editable, displaying the details of the last modification. If changes are made to event history, it impacts specific process, part, production type, track number, and count.
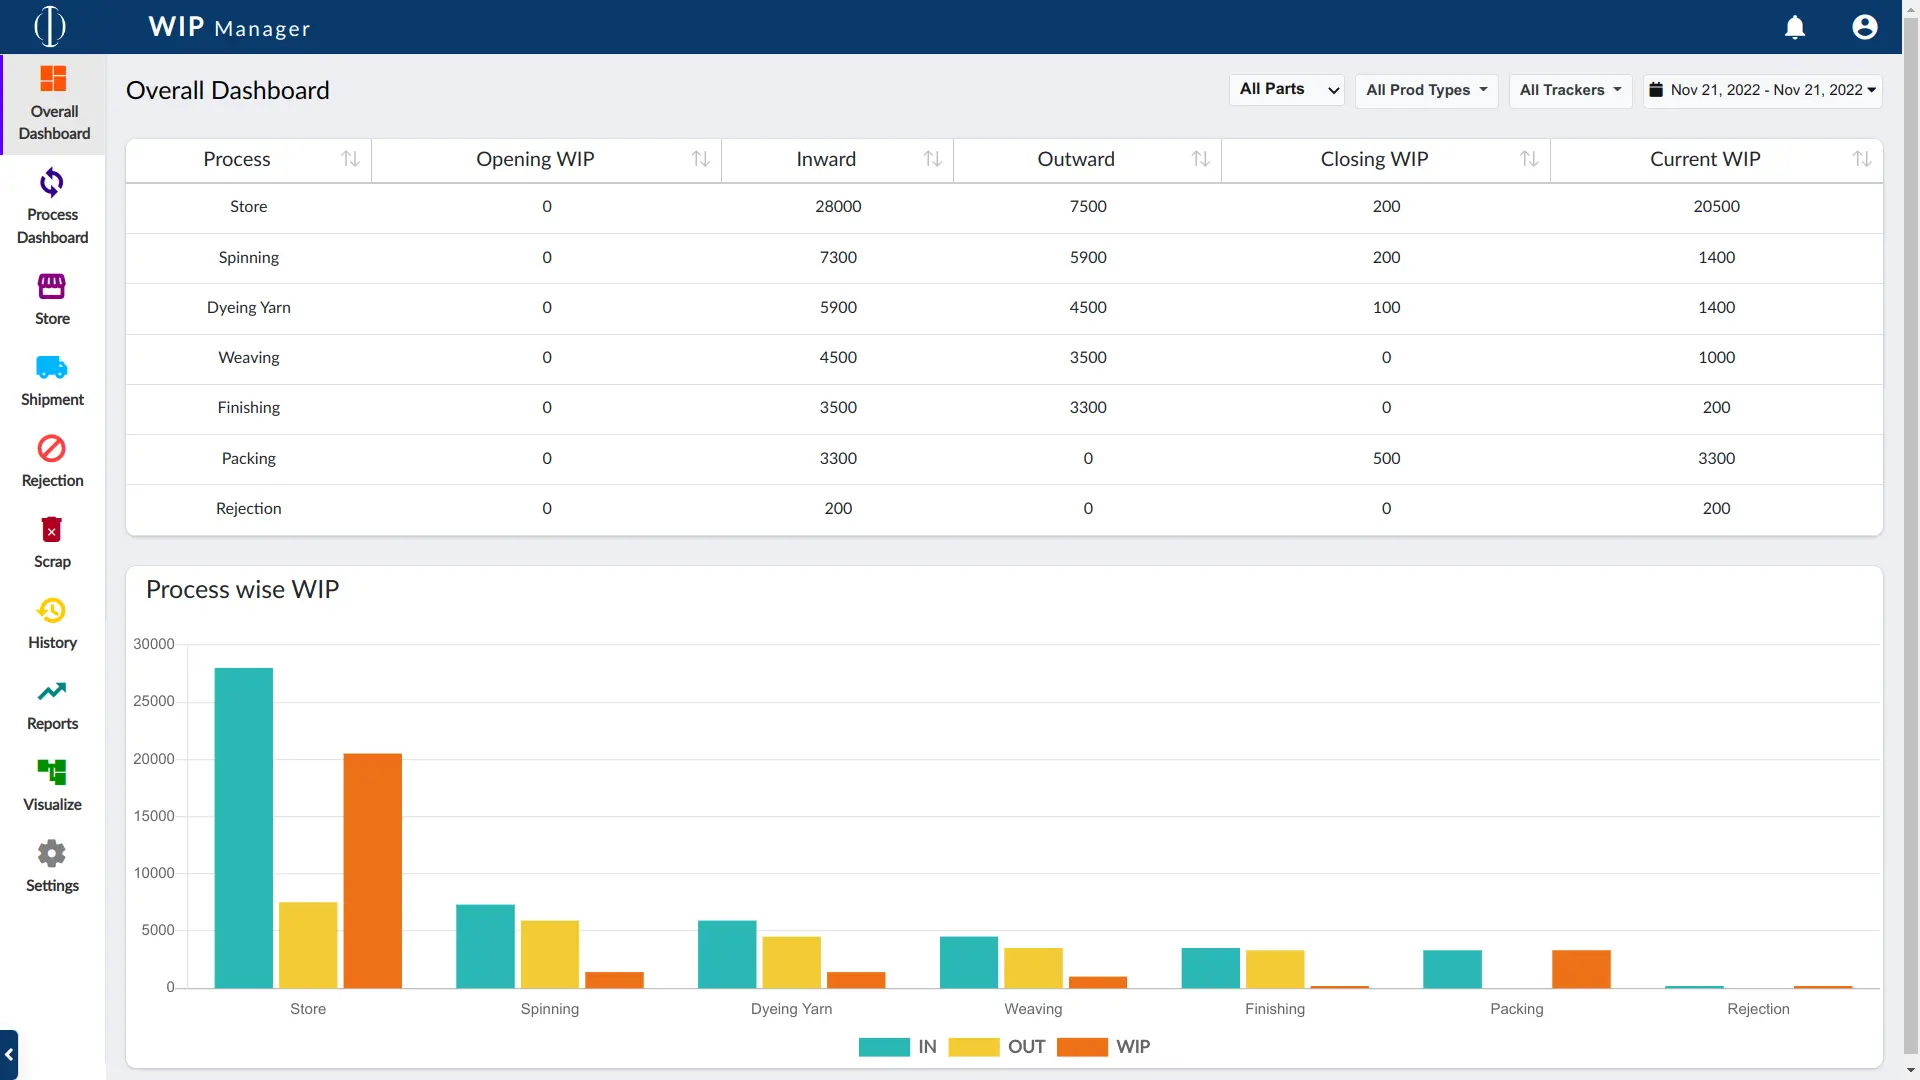
The Overall Dashboard provides insights into process, inward/outward raw material data, and process WIP counts. Within this page, you can access a bar chart presenting process-wise WIP reports. By selecting parts, product types, and track numbers, you can generate specific results. For data concerning a particular interval in the process, choose the desired duration from the top right corner of this page.
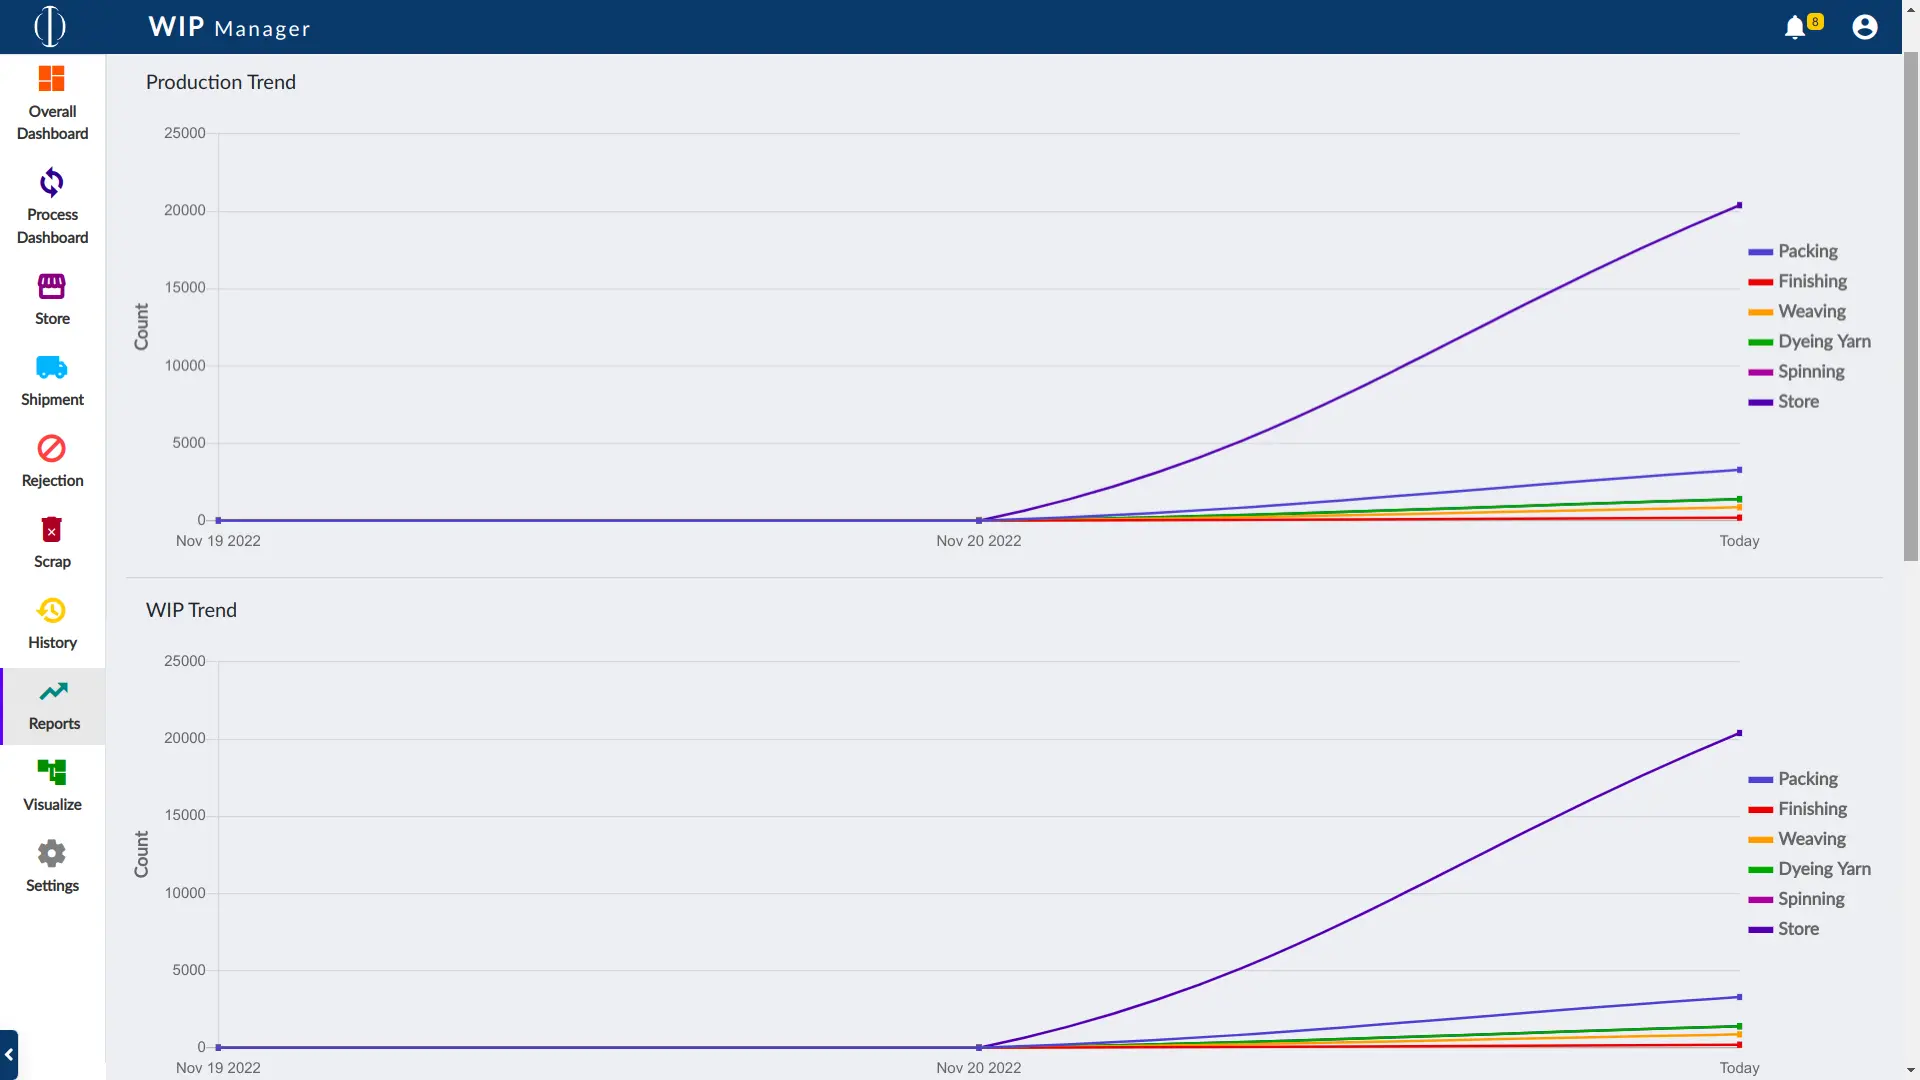
Within the Reports page, you can access production trend data alongside WIP trend information. This section allows you to observe and analyze trends related to production and work-in-progress over specific periods. You can gain valuable insights into the trajectory of production and the evolution of work-in-progress through these trend-based analyses.
Lets Get Started
We are with all ears waiting to hear from you. Post us with your questions and feedback.